
Step 1: Log in and Access Settings: Start by logging into your Owl Practice account. Navigate to the Settings tab from the main navigation.
Step 2: Check Your Subscription: Ensure you are subscribed to the Owl Pro plan. The new insurance feature is exclusively available in Owl Pro. If you're currently on Owl Starter or Owl Core, you'll need to upgrade to Owl Pro to access these enhanced capabilities.
Step 3: Set Up Your New Insurance Profile: Navigate to 'Practice Details' within Settings and select the 'Insurance' tab.
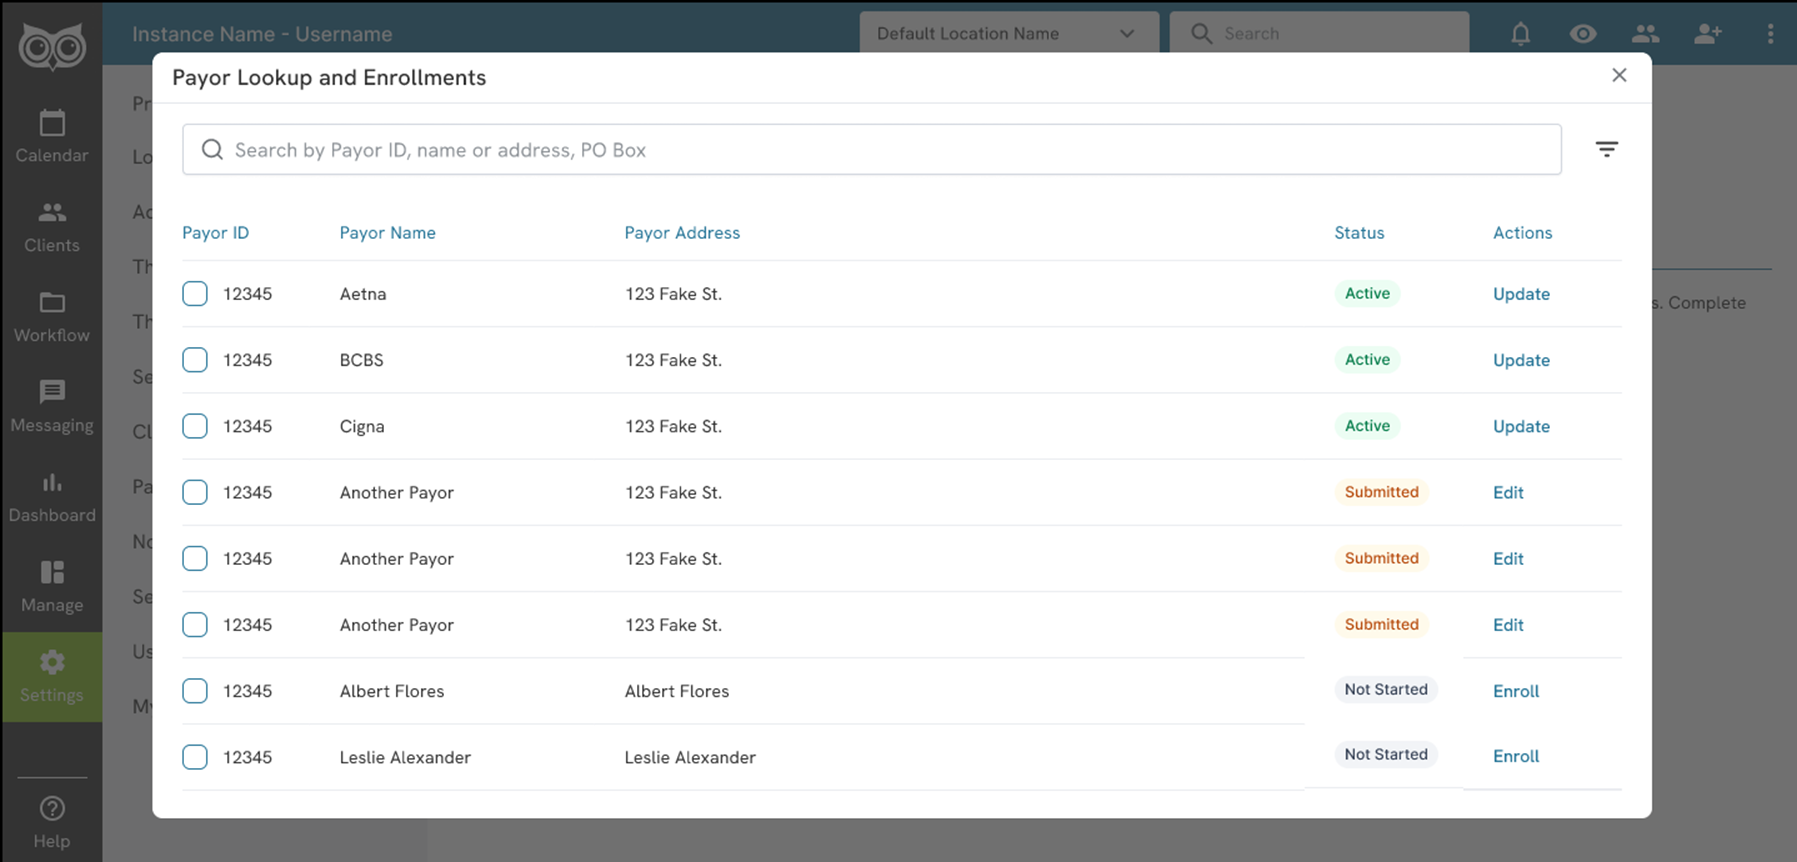
Step 4: Enroll with Payors: Follow the steps outlined here to enroll with payors through the new insurance feature.
Step 5: Check Payor Enrollment Status: After submitting your payor enrollment requests, monitor your status by navigating to Settings, Insurance, Payor Lookup & Enrollments, and then select 'Lookup Payors'. You'll also receive an email notification once your enrollment is active. 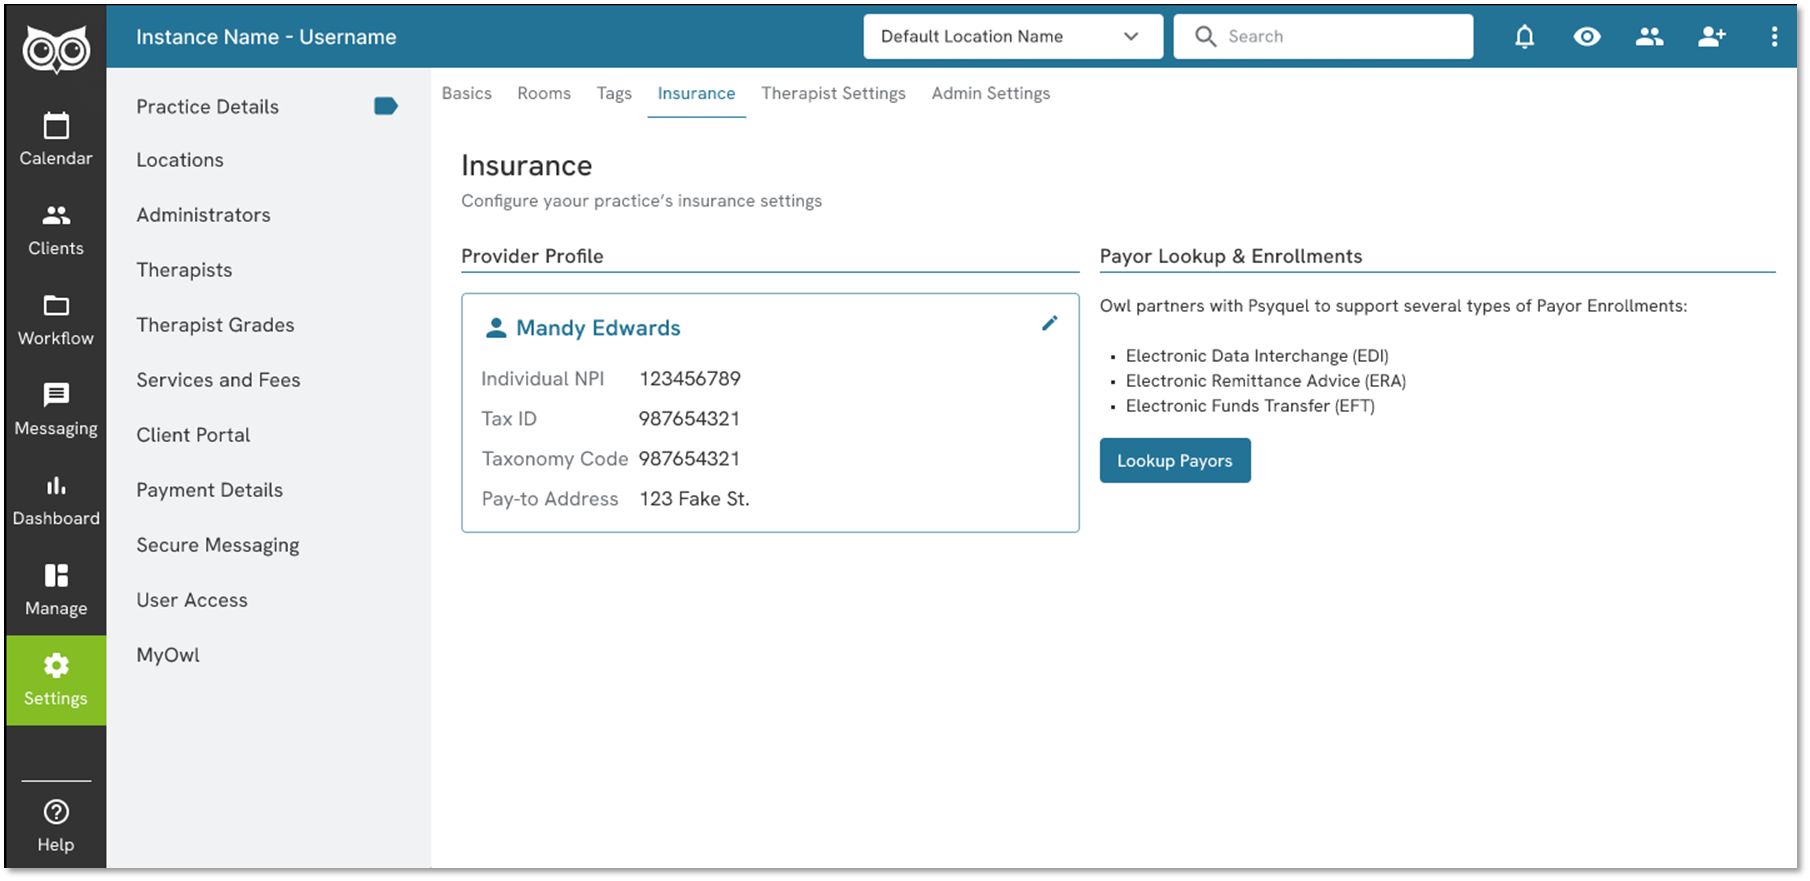
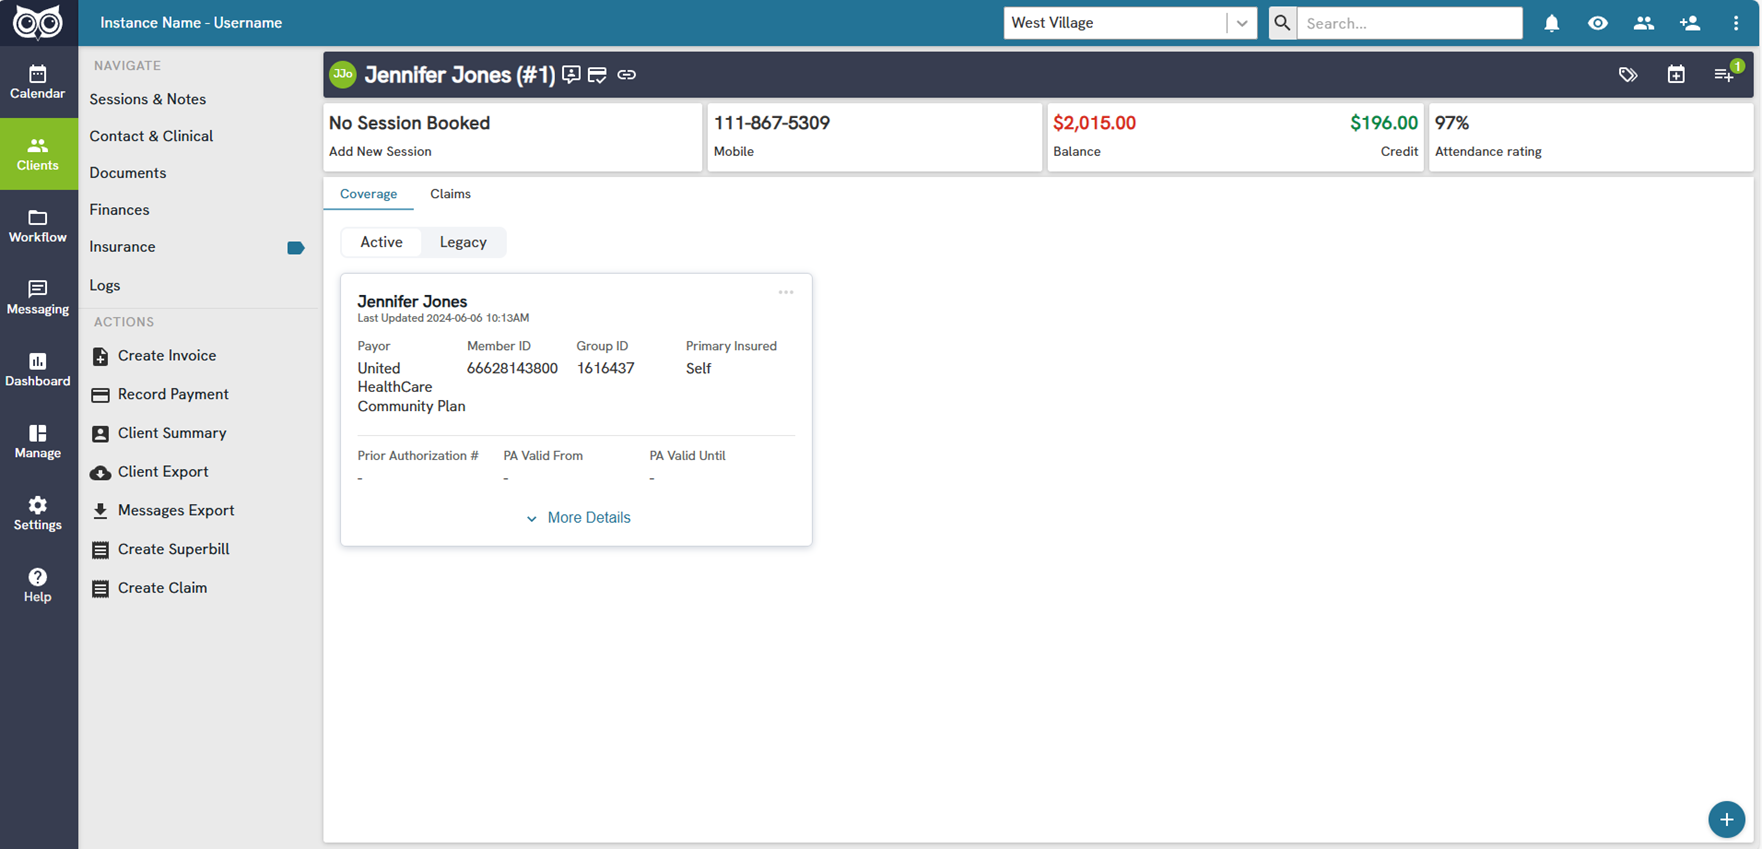
Step 6: Viewing and Submitting Claims: Once payor enrollment is active, begin submitting claims through the new insurance feature. Refer to our Claims Guide for detailed instructions on claim submission.
You're All Set!
By switching to Owl Practice's new insurance feature, you'll enjoy a streamlined and efficient insurance management experience directly integrated into your practice workflow.
Additional Resources
Owl Integrated Insurance Overview
Get started by creating your Insurance Profile
Get Connected: Enroll with any Payor through our Network
Establish client coverage and request benefit verification (VOB) details
View and Track Insurance Claims
Support Available
Should you encounter any issues or need assistance during the transition from Change Healthcare to Owl Practice's new insurance feature, our support team is ready to help. Contact us at support@owlpractice.com or schedule a session for prompt assistance.